Setting up remote access to a MySQL server on your server can be useful for various reasons, such as managing your database from different locations or connecting applications hosted on separate servers to your database. It allows you to centralize your data storage and perform database administration tasks more efficiently.
Here's a simple guide to set up remote access to a MySQL server on an Ubuntu server, assuming you already have a MySQL server installed:
1. Configure MySQL server to allow remote connections:
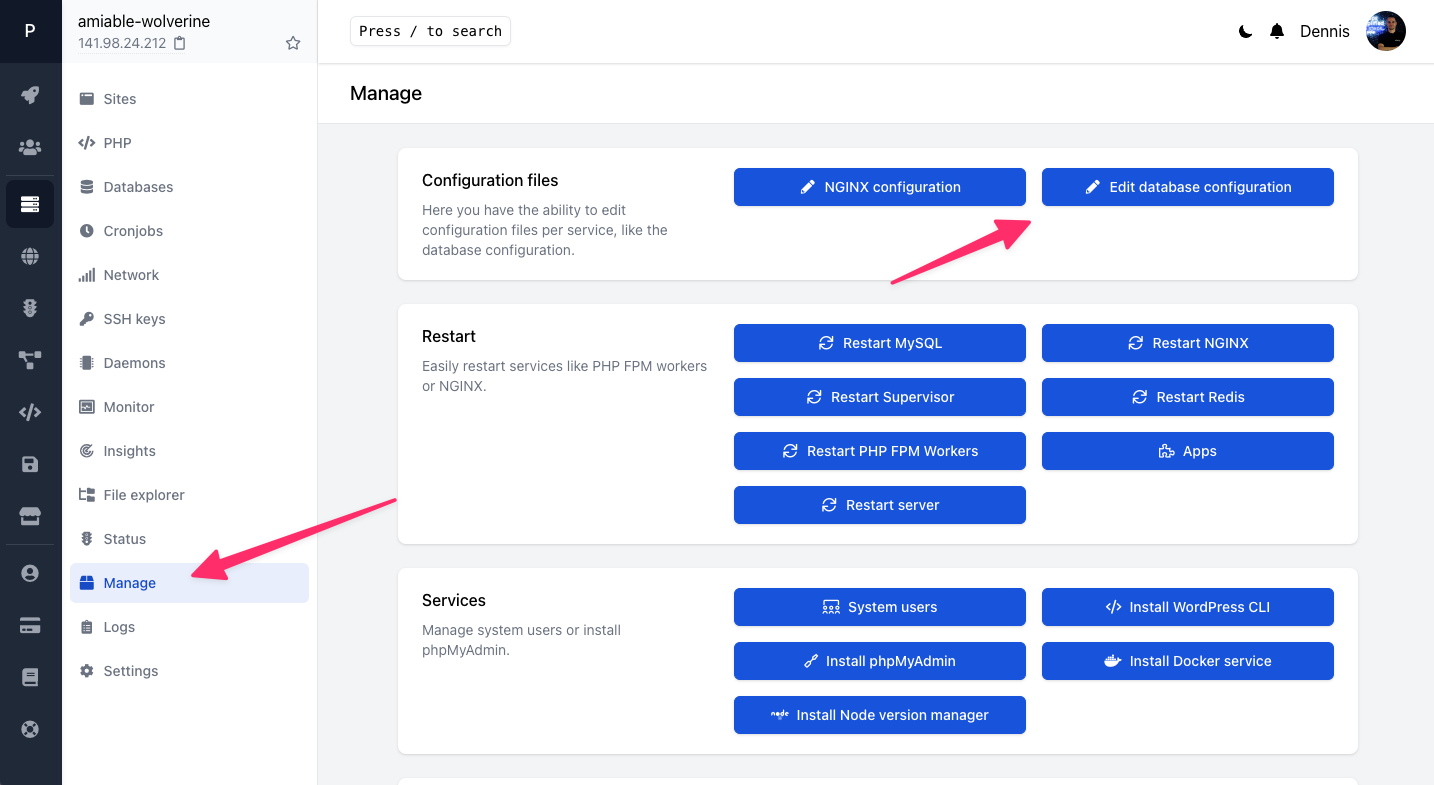
By default, MySQL only listens for local connections. You can edit the database configuration in Ploi by going to the Manage tab and by pressing Edit database configuration. CleanShot 2023-04-06 at 08.44.59.png 148.63 KBIf you want to do it manually: open the MySQL configuration file (my.cnf) in a text editor. The location of this file can vary, but common locations are /etc/mysql/mysql.conf.d/mysqld.cnf or /etc/mysql/my.cnf.
Find the line with bind-address and change its value to 0.0.0.0 to allow connections from any IP address, or set it to a specific IP address to restrict remote access to that address:
bind-address = 0.0.0.0Save the file.
2. Restart MySQL service:
Restart the MySQL service for the changes to take effect, you can do that via the Service tab or by running this command in SSH:
sudo systemctl restart mysql.service3. Create a remote user
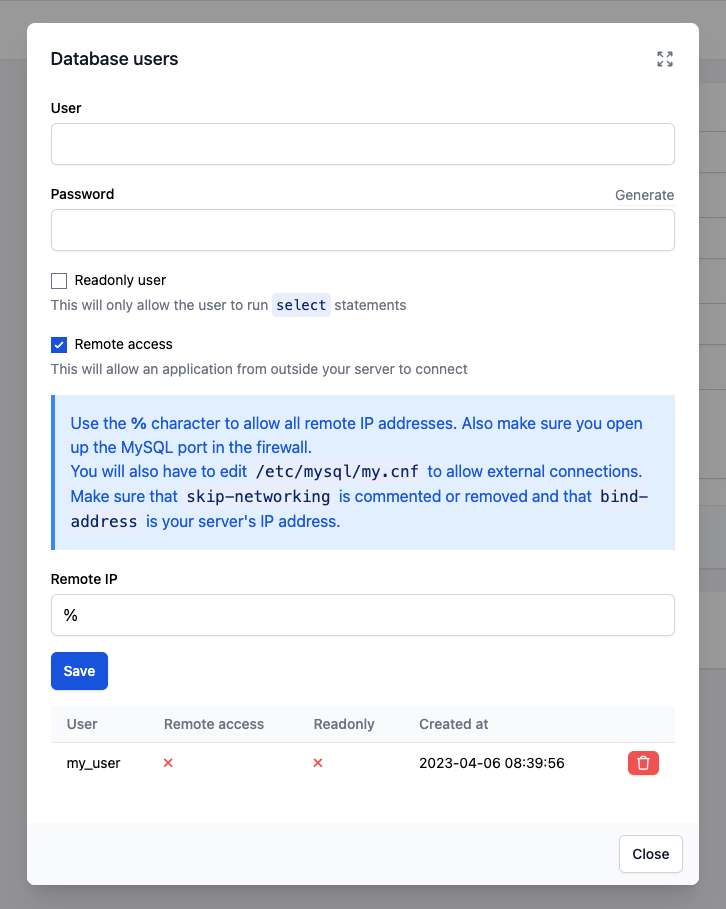
Now you'll have to create a user that allows remote connections, you can do that by pressing the dropdown in the Databases tab behind your database, and press Users.
Next, create a fresh user with remote access on, optionally fill in an IP address.
 CleanShot 2023-04-06 at 08.41.17.png 88.96 KB4. Update firewall rules
If you have a firewall enabled (e.g., UFW), you will need to allow connections to the MySQL server. By default, MySQL listens on port 3306. To allow incoming connections on this port, you can head over to the Network tab and allow the port 3306 there.
If everything is set up correctly, you should now be connected to your MySQL server remotely.
If you're more of a visual learner, we also have a quick video on how to achieve this:
