WordPress multisite is a great way to manage multiple sites from 1 panel. Luckily, WordPress makes this very easy.
In this article we'll be covering how to set this up with sub-directories and domain aliases.
First create a site and install WordPress on that. Next run through the installer wizard and make sure your WordPress site is up and running.
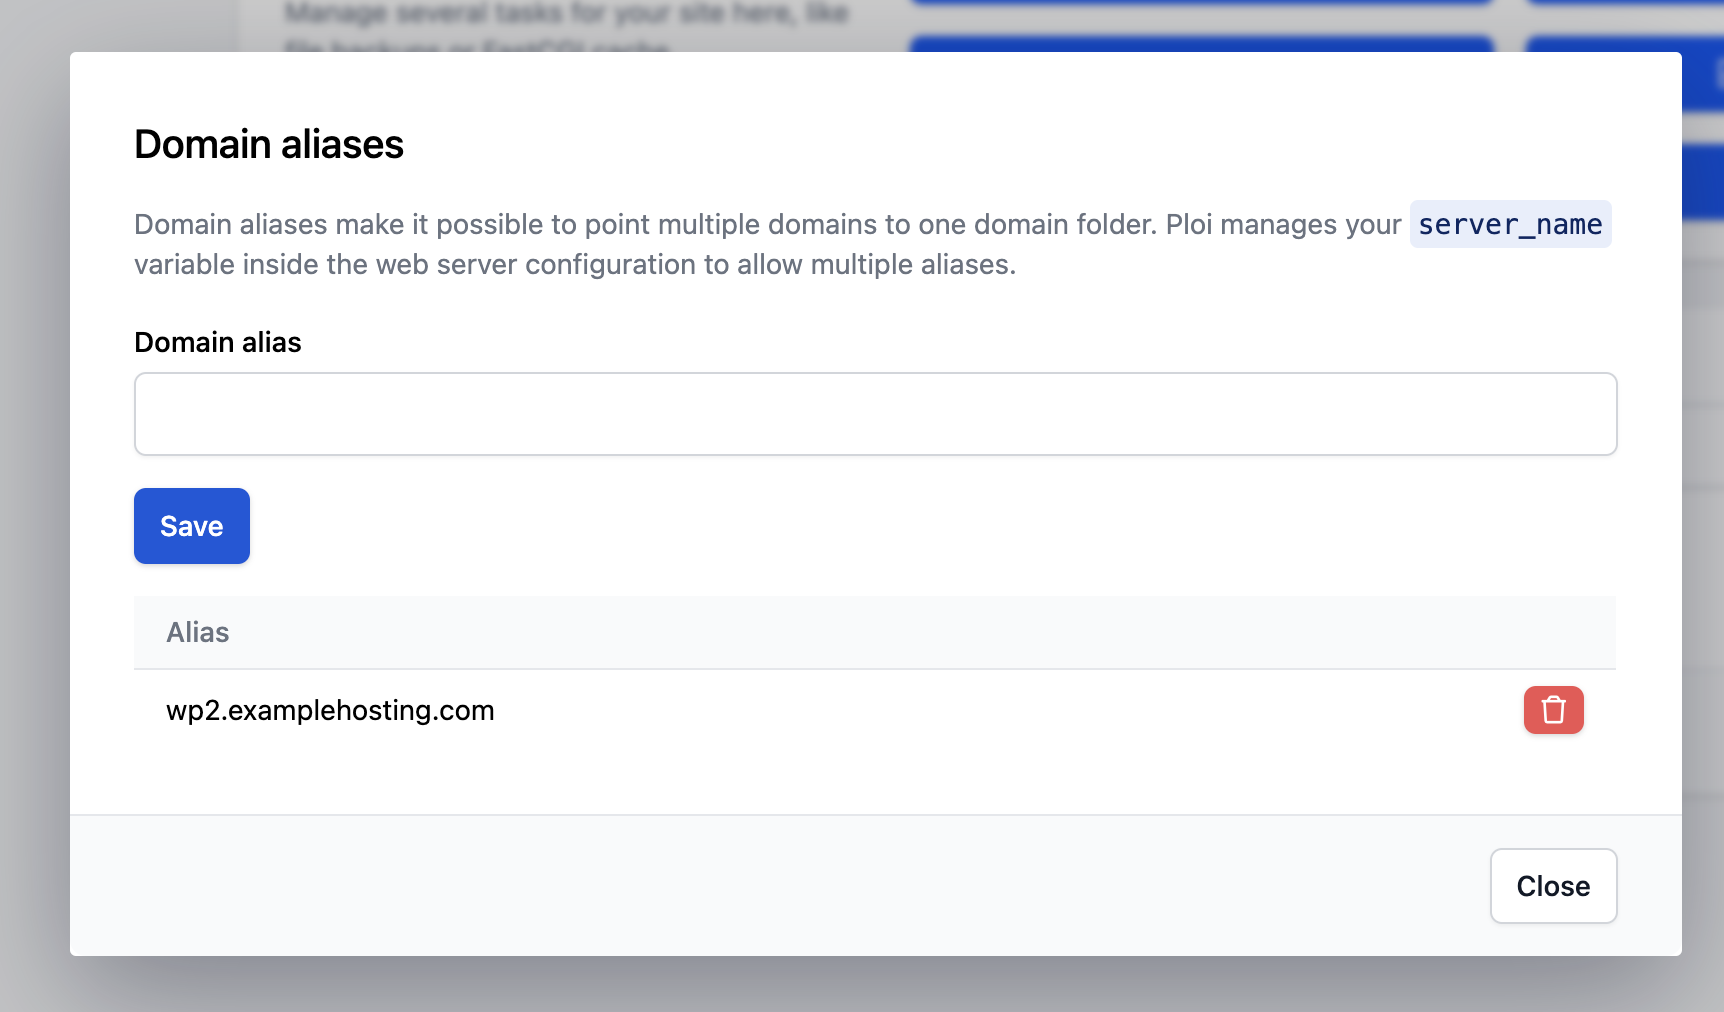
After this we need to add the domain alias, luckily you can easily do this via the Ploi UI inside the Manage tab on site level:
Next we are going to edit 2 files, the wp-config.php and the NGINX configuration.
First edit the wp-config.php file which you can do through the Ploi panel and add this line:
define( 'WP_ALLOW_MULTISITE', true );
/* That's all, stop editing! Happy publishing. */
Make sure that you add the line just before:
/* That's all, stop editing! Happy publishing. */
Next edit your NGINX configuration of your site and add this inside the server{} block:
if (!-e $request_filename) {
    rewrite /wp-admin$ $scheme://$host$request_uri/ permanent;
    rewrite ^(/[^/]+)?(/wp-.*) $2 last;
    rewrite ^(/[^/]+)?(/.*\.php) $2 last;
}
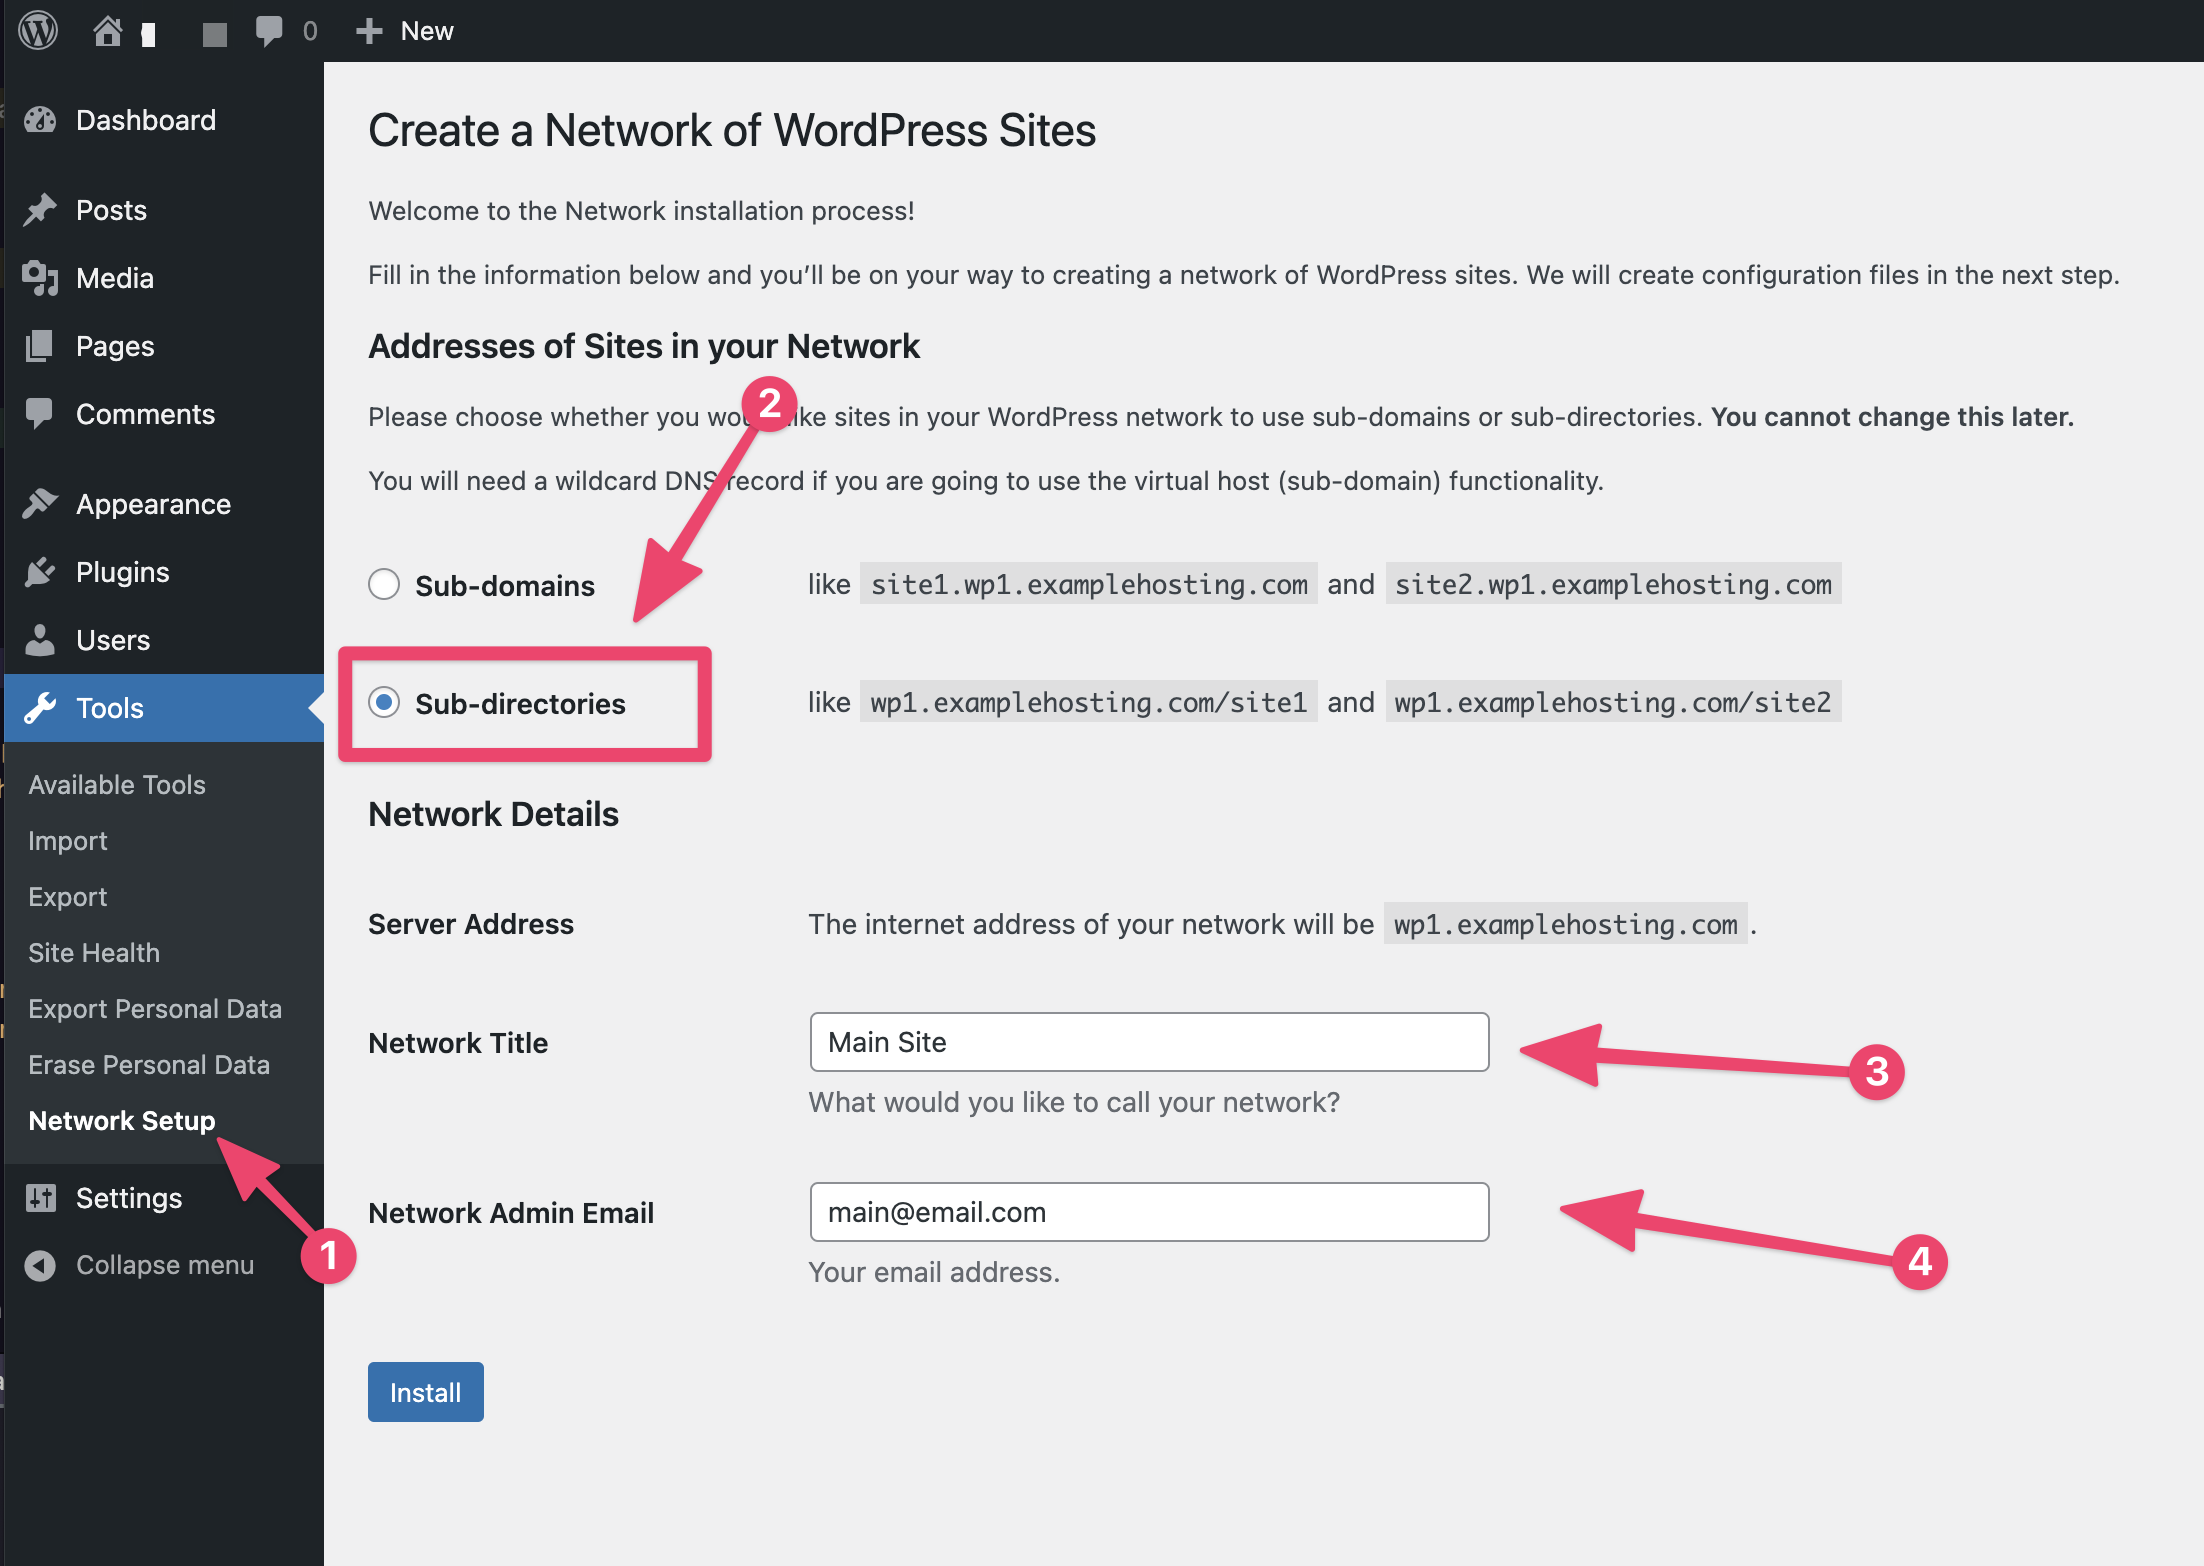
Now head over to your WordPress installation and login as administrator. In the sidebar go to Tools > Network Setup.
Select Sub-directories, enter the title and email address and press Install.
Once installed, you will see additional configuration you need to add to your wp-config.php file. This looks like this:
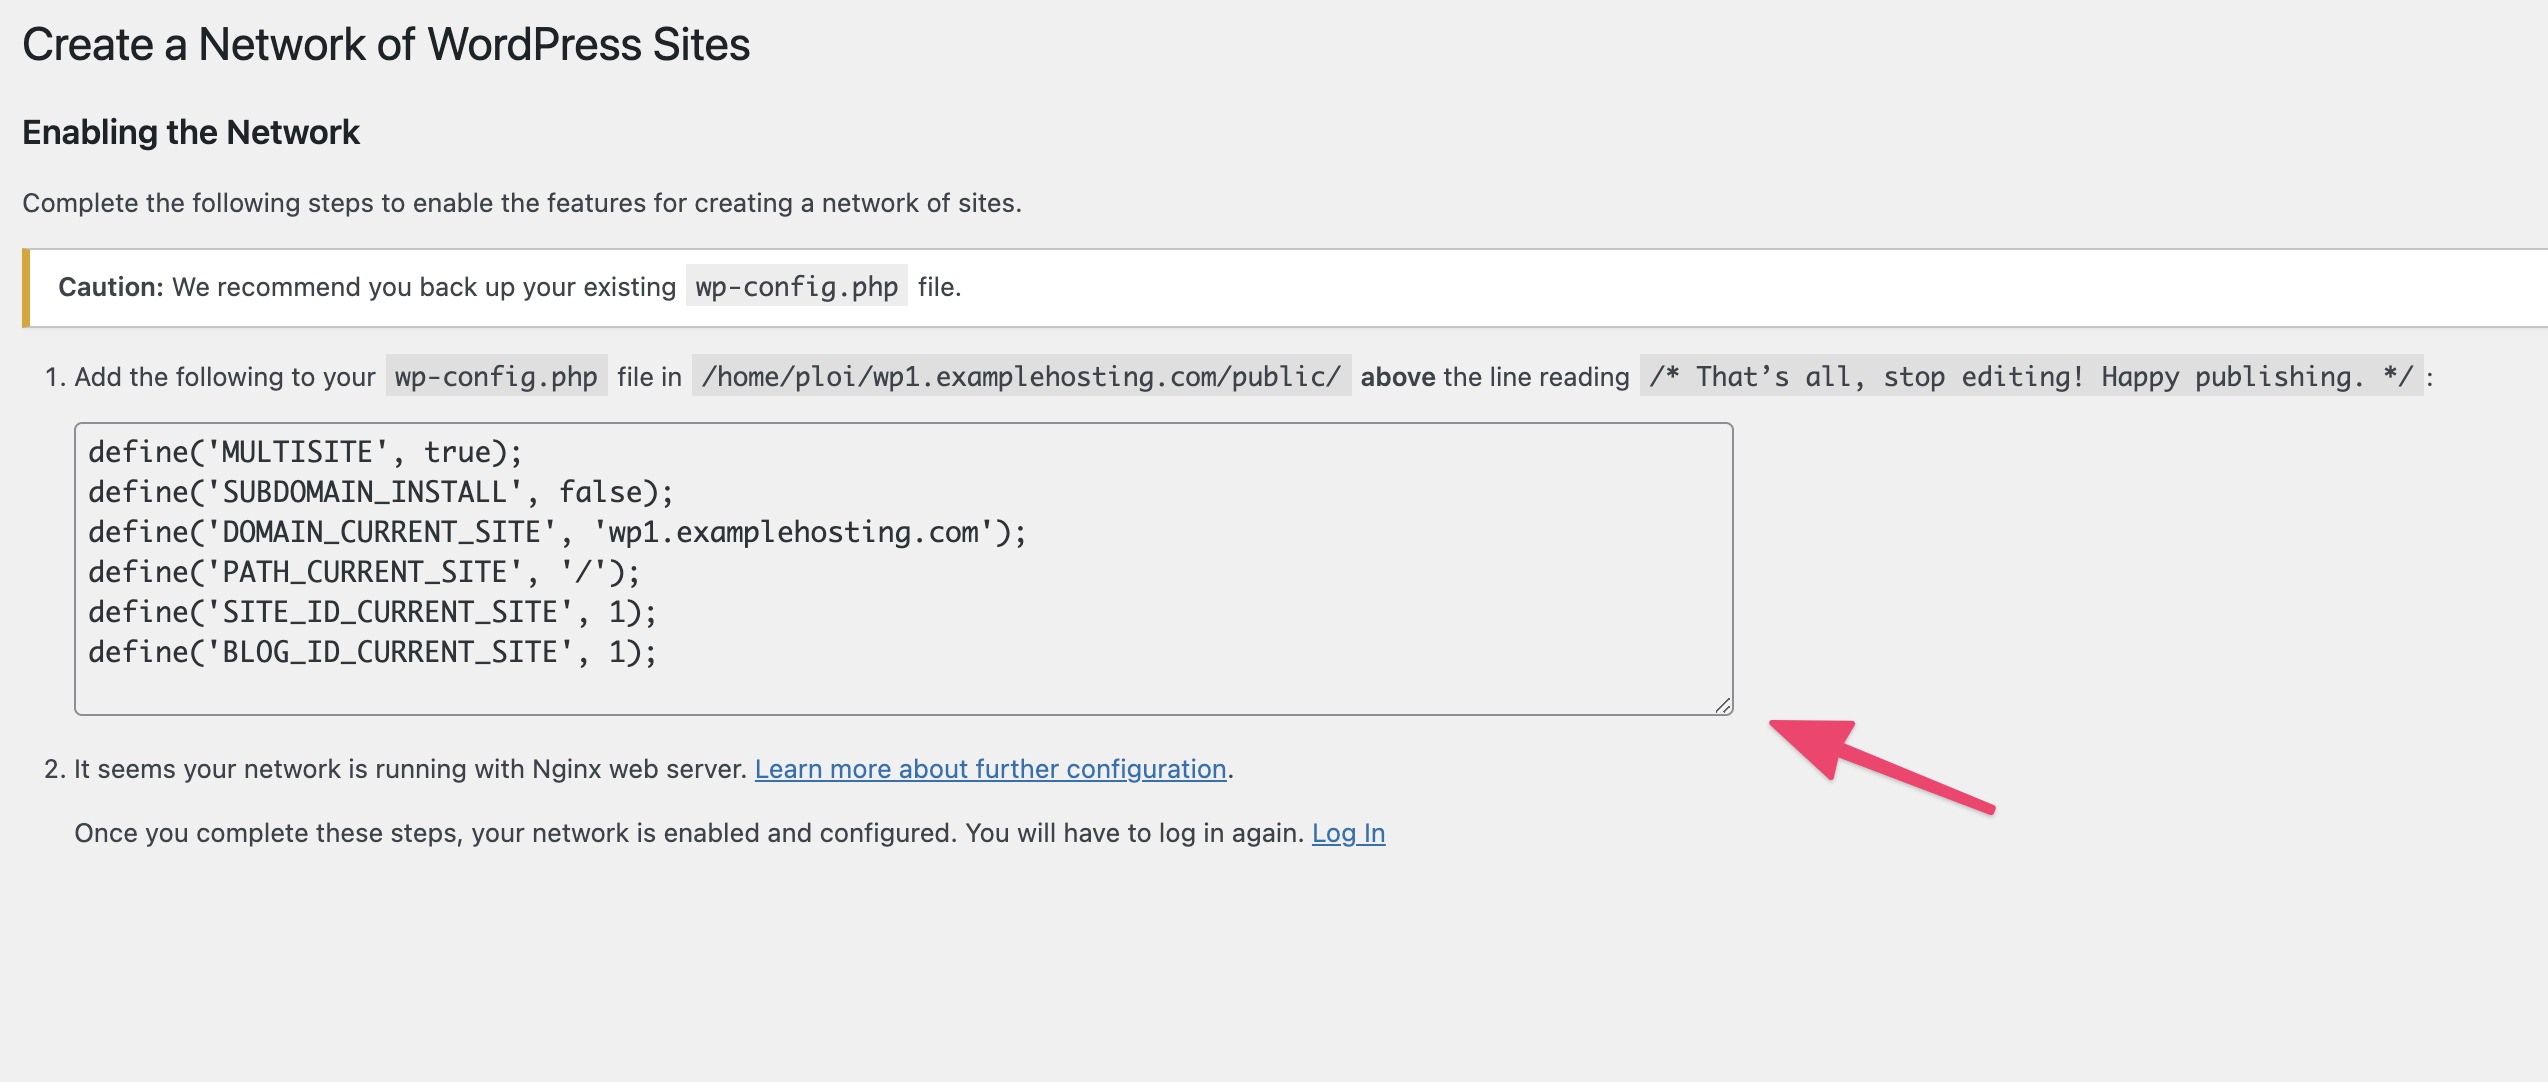
Earlier, we already added the WP_ALLOW_MULTISITE directive to your wp-config.php file, you can add the configuration presented below that directive, but make sure it is above this:
/* That's all, stop editing! Happy publishing. */
The new configuration that you may have to add looks like this (except the domain might be different):
define('MULTISITE', true);
define('SUBDOMAIN_INSTALL', false);
define('DOMAIN_CURRENT_SITE', 'wp1.examplehosting.com');
define('PATH_CURRENT_SITE', '/');
define('SITE_ID_CURRENT_SITE', 1);
define('BLOG_ID_CURRENT_SITE', 1);
So in total it will look like this:
define( 'WP_ALLOW_MULTISITE', true );
define('MULTISITE', true);
define('SUBDOMAIN_INSTALL', false);
define('DOMAIN_CURRENT_SITE', 'wp1.examplehosting.com');
define('PATH_CURRENT_SITE', '/');
define('SITE_ID_CURRENT_SITE', 1);
define('BLOG_ID_CURRENT_SITE', 1);
/* That's all, stop editing! Happy publishing. */
You've already complete step 2 automatically before in this guide so you can start by logging in again, your installation will also ask you to do this.
Now let's start adding the second site and set that up.

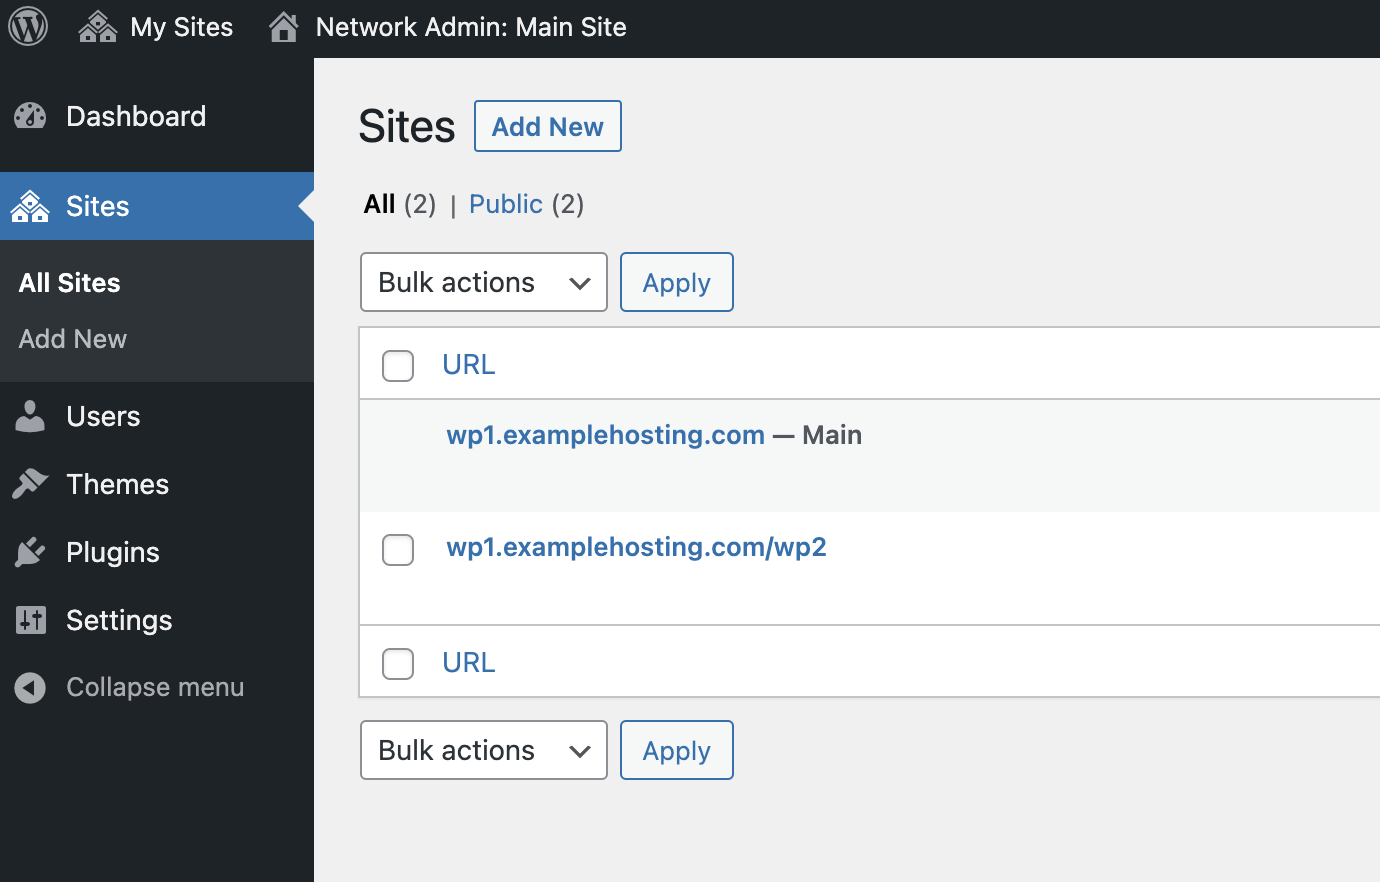
At the top, select My Sites -> Network Admin -> Sites, in here you'll see a list of your current site, only one should be listed.
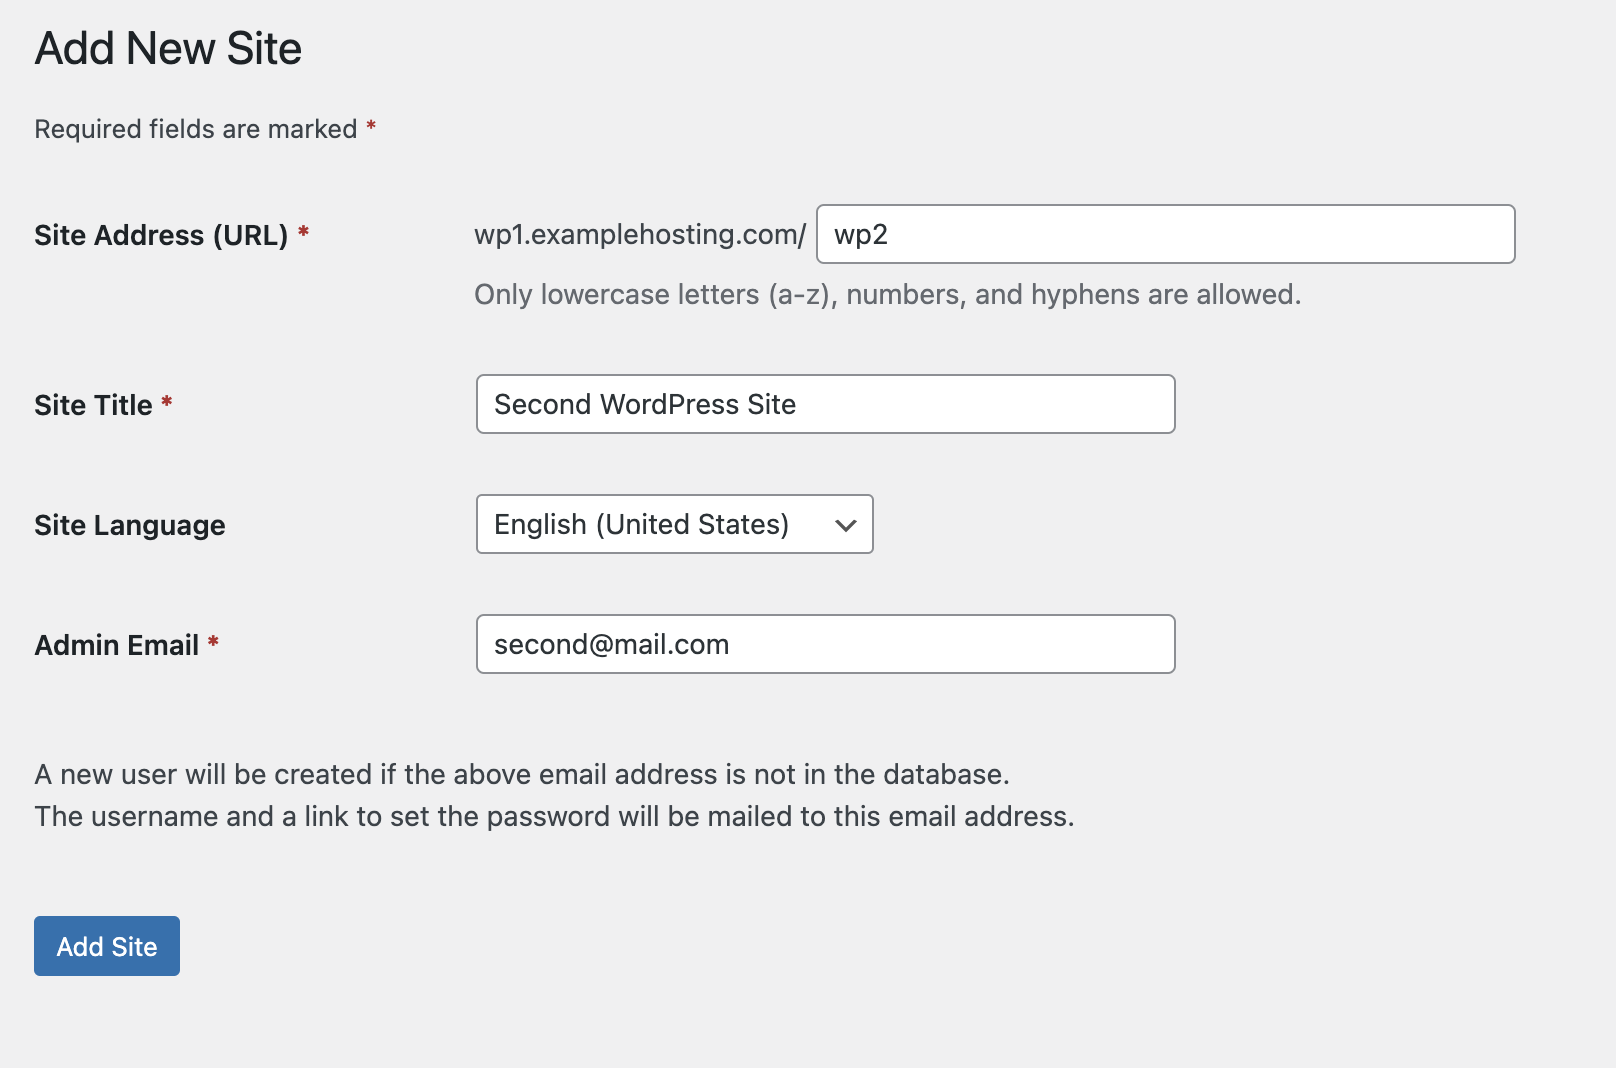
Press Add New and fill in the details. We recommend to choose a folder name that reflects your second site's name. For now we are going to use wp2 in this example:
Press Add Site, and go back to the sites overview:
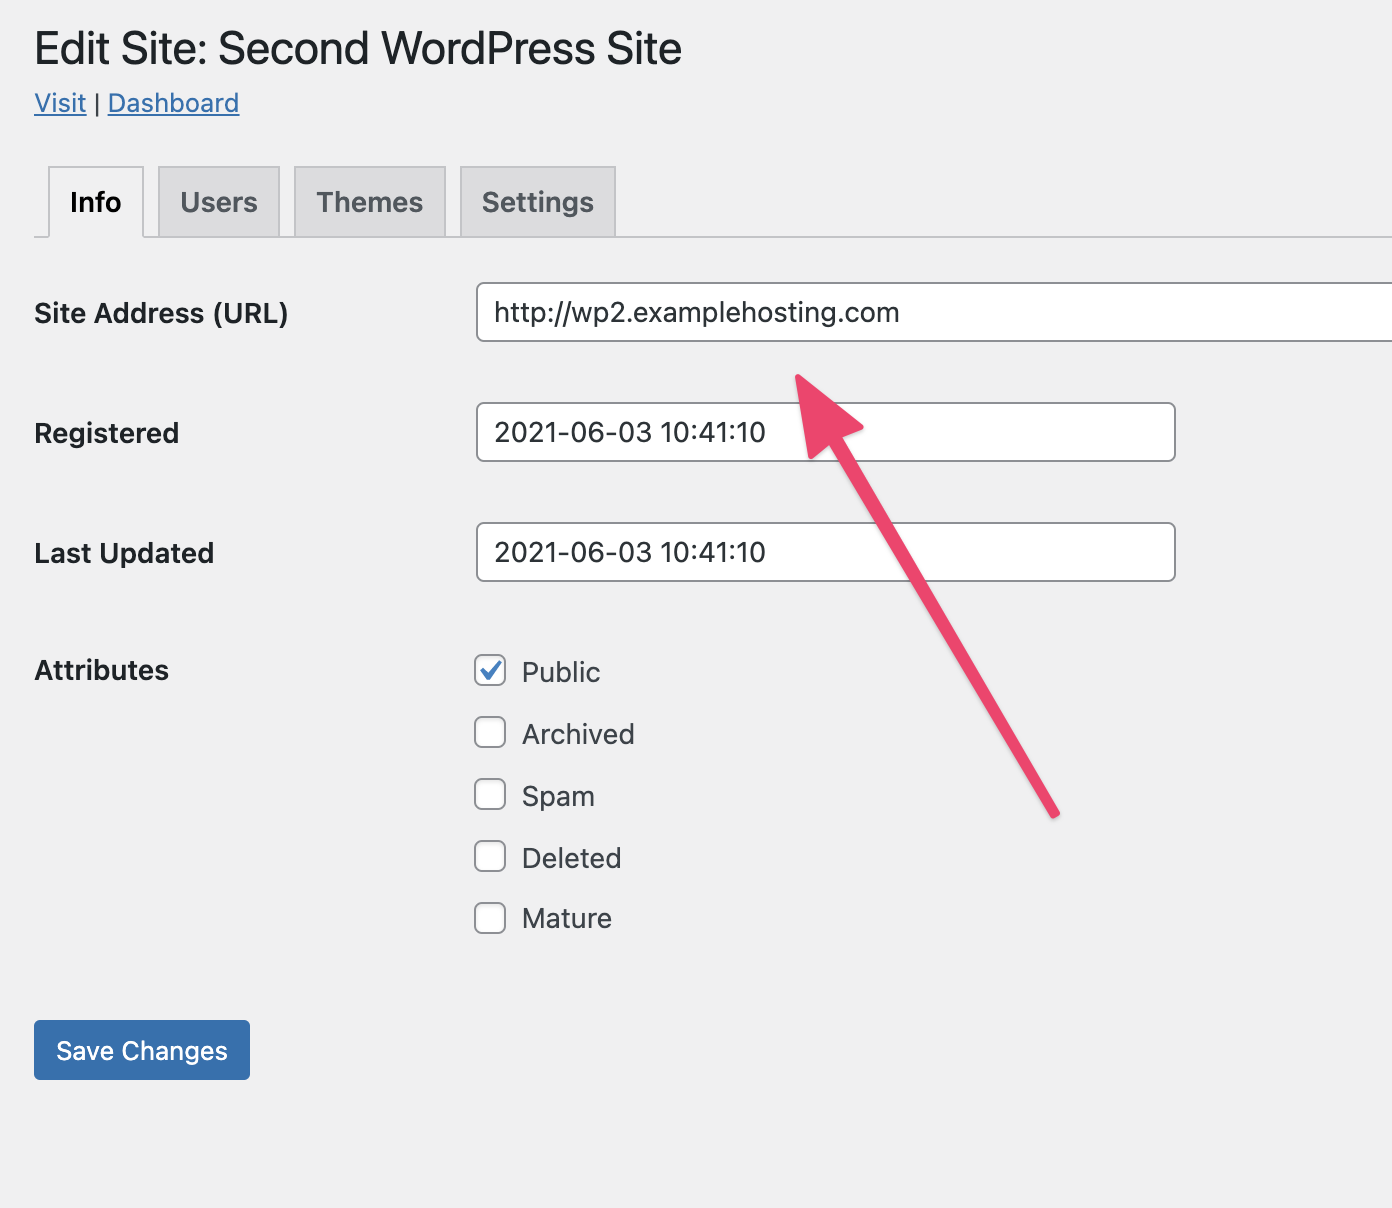
Edit the second site you have just and edit the Site Address (URL) to reflect your domain alias:
And that's it! You now have a multisite WordPress installation setup.